You are here
Use Case 2
MARINE SPECIES LIST AND NUMBER OF OBSERVATIONS PER GEOGRAPHICAL AREA [demo]
SET UP:
You upload a list with marine place names (e.g. name of an EEZ, Ocean) and want to know which species have already been observed in these areas, and how many times (based on OBIS).
The input file is a text file containing one column: Location (example).
This use case combines two web services in a fixed order: (1) Get lat-lon by accepted name, (2) Taxon list of a certain region.
(1) First, the web service 'Get lat-lon by accepted name' matches the uploaded place names (e.g. name of an EEZ, Ocean) to the MarineRegions gazetteer, and translates these place names into MRGIDs (Marine Regions Geographic IDentifier). The MRGID is added to the original input file as an extra column. The MRGID can refer to a point location, a polygon or an envelop, but for the next step only polygons and envelops are taken into account.
(2) Second, the web service 'Taxon list of a certain region' generates a marine species list derived from the Ocean Biodiversity Information System (OBIS) for this MRGID. The ScientificName and AphiaID (the unique identifier of the World Register of Marine Species - WoRMS) are added to the original input file as extra columns.
HOW TO:
1. Upload your file
Upload your data file and select the relevant row and column delimiter and decimal symbol. Select "lifewatch" for data format.

2. Select web services
Select the required web services: 'Get lat-lon by accepted name' and 'Taxon list of a certain region'.

3. Verify order, change order if necessary and run
The order of the selected web services can be changed by dragging the grey bars with the arrows. The required web service order for this use case is (1) Get lat-lon by accepted name, (2) Taxon list of a certain region.

4. Preview screen
When you click "Next", you are redirected to the preview screen. Make sure that every column name from the uploaded file corresponds with a column name from the pick list. In this case choose 'Location'.
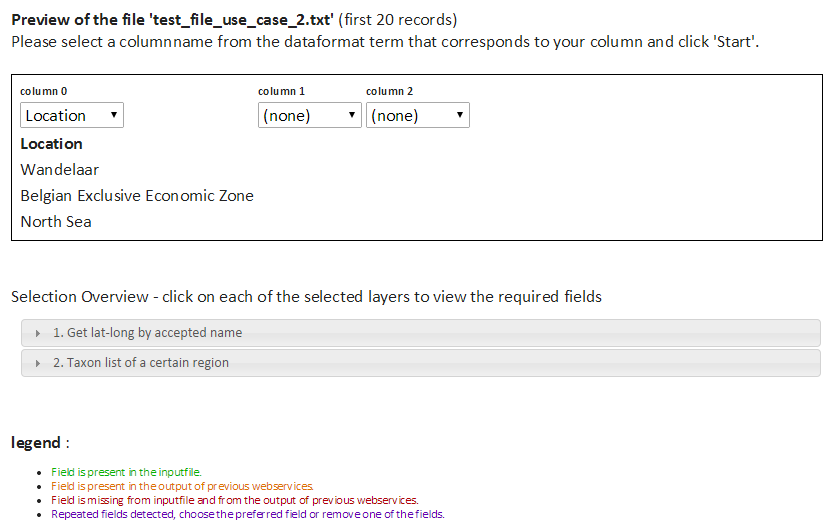
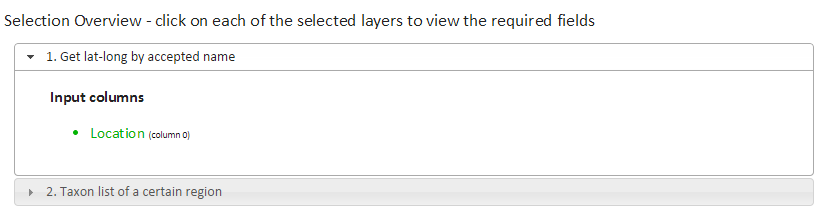
In the lower section of the preview screen, you can find information about duplicate or missing fields per requested web service. Check for every web service if the required fields are present in the input file or will be generated by a previous web service.

5. Results
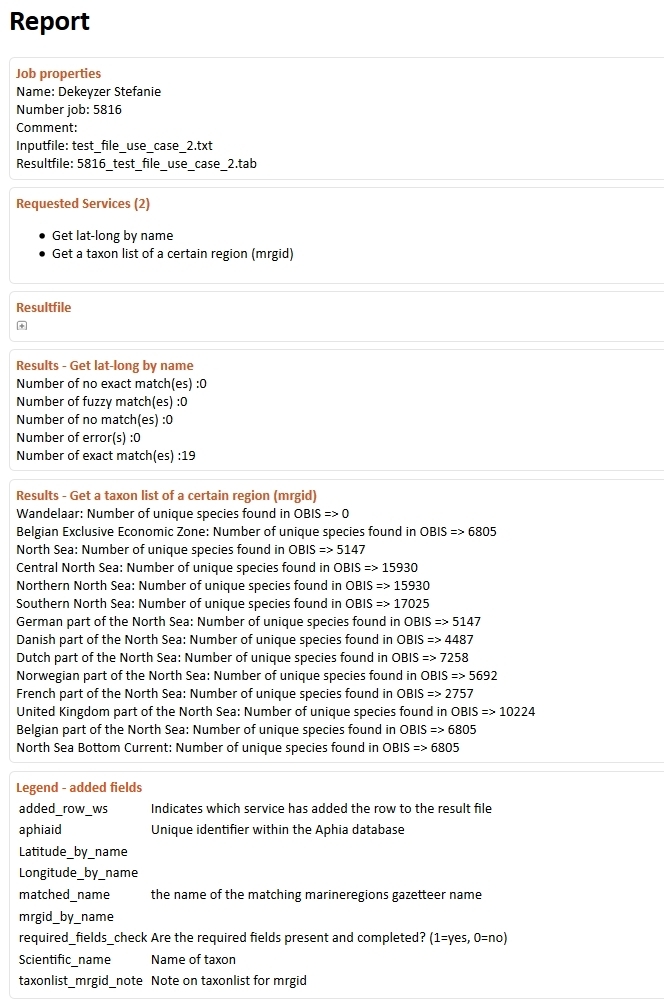
Click "Start". The following message appears:

Click on "Results". Your result file (example) will appear at the top of the results table. The result report gives an overview of the requested web services, the results per web service, any errors that might have occurred during the process, and a legend of the added fields in the result file. The result file is also available through the result report.